Graylog 란?
연결되어있는 로그들의 정보를 수집, 분석 및 파악을 진행하여 결과를 출력해주는 로그 집중화 기능을 가지고 있는 오픈소스 툴. 실시간 로그 검색/입력이 가능하며 심플한 UI로 원하는 로그들의 내용을 확인할 수 있도록 설계되어있음. 또한 ssh 설정등을 통해 메일 알람도 가능한 다방면 로그 집중화 오픈소스 툴이다.
Graylog 특징
1) 원하는 syslog를 UDP, TCP 어떤 방법으로든 수신 가능하며 port 또한 원하는대로 사용 가능.
2) NginX 등 이용한 무중단 클러스터 구성들 가능 프록시 및 로드밸런싱 또한 지원
3) 사용자 별 원하는 자료만 확인할 수 있도록 UI 구성
Graylog 구축
1. 사전 패키지 설치
1-1. Pwgen 설치
# yum install pwgen
1-2. java 설치
# yum install java-1.8.0-openjdk-headless
1-3. MongoDB 설치
Repository에 mongoDB등록
# vi /etc/yum.repos.d/mongodb-org.repo
| [mongodb-org-4.2] name=MongoDB Repository baseurl=https://repo.mongodb.org/yum/redhat/$releasever/mongodb-org/4.2/x86_64/ gpgcheck=1 enabled=1 gpgkey=https://www.mongodb.org/static/pgp/server-4.2.asc |
# yum install mongodb-org
# systemctl daemon-reload
# systemctl enable --now mongod.service
1-4. Elasticsearch 설치
Repository 에 Elasticsearch 등록
# rpm --import https://artifacts.elastic.co/GPG-KEY-elasticsearch
#vi /etc/yum.repos.d/elasticsearch.repo
| [elasticsearch-7.x] name=Elasticsearch repository for 7.x packages baseurl=https://artifacts.elastic.co/packages/oss-7.x/yum gpgcheck=1 gpgkey=https://artifacts.elastic.co/GPG-KEY-elasticsearch enabled=1 autorefresh=1 type=rpm-md |
# yum install elasticsearch-oss
Elasticsearch 설정파일 수정
# vi /etc/elasticsearch/elasticsearch.yml
| # ---------------------------------- Cluster ----------------------------------- # # Use a descriptive name for your cluster: # cluster.name: graylog # # ------------------------------------ Node ------------------------------------ --- 중략 --- # ---------------------------------- Various ----------------------------------- # # Require explicit names when deleting indices: # #action.destructive_requires_name: true # action.auto_create_index: false |
# systemctl daemon-reload
# systemctl enable --now elasticsearch.service
실행 확인 및 오류 점검
# curl -X GET http://localhost:9200
| [root@linux200 ~]# curl -X GET http://localhost:9200 { "name" : "GSvu6jJ", "cluster_name" : "glaylog", "cluster_uuid" : "BONZkGNOSQOOHU4T4CqDzA", "version" : { "number" : "6.8.17", "build_flavor" : "default", "build_type" : "rpm", "build_hash" : "206f6a2", "build_date" : "2021-07-01T18:51:20.391869Z", "build_snapshot" : false, "lucene_version" : "7.7.3", "minimum_wire_compatibility_version" : "5.6.0", "minimum_index_compatibility_version" : "5.0.0" }, "tagline" : "You Know, for Search" } |
# curl -XGET 'http://localhost:9200/_cluster/health?pretty=true'
| { "cluster_name" : "glaylog", "status" : "green", "timed_out" : false, "number_of_nodes" : 1, "number_of_data_nodes" : 1, "active_primary_shards" : 0, "active_shards" : 0, "relocating_shards" : 0, "initializing_shards" : 0, "unassigned_shards" : 0, "delayed_unassigned_shards" : 0, "number_of_pending_tasks" : 0, "number_of_in_flight_fetch" : 0, "task_max_waiting_in_queue_millis" : 0, "active_shards_percent_as_number" : 100.0 } |
2. graylog 서버 설치
2-1 graylog repo download
# rpm -Uvh https://packages.graylog2.org/repo/packages/graylog-4.1-repository_latest.rpm
# yum install graylog-server
2-2. graylog server 설정
# pwgen -N 1 -s 96
UjU9GJh9945vLtNuX0wGUoPjYBU6OtfwtzT2zABLA5HeFAyl6oPVrfA7j0bSB6UQmvD45Hvkra30DDzRk065uPM0vUSFS00Y
# echo -n graylog | sha256sum
4bbdd5a829dba09d7a7ff4c1367be7d36a017b4267d728d31bd264f63debeaa6
# vi /etc/graylog/server/server.conf
| 1) 계정 확인 및 비밀번호 설정 # You MUST set a secret to secure/pepper the stored user passwords here. Use at least 64 characters. # Generate one by using for example: pwgen -N 1 -s 96 password_secret = UjU9GJh9945vLtNuX0wGUoPjYBU6OtfwtzT2zABLA5HeFAyl6oPVrfA7j0bSB6UQmvD45Hvkra30DDzRk065uPM0vUSFS00Y # The default root user is named 'admin' #root_username = admin # You MUST specify a hash password for the root user (which you only need to initially set up the # system and in case you lose connectivity to your authentication backend) # This password cannot be changed using the API or via the web interface. If you need to change it, # modify it in this file. # Create one by using for example: echo -n yourpassword | shasum -a 256 # and put the resulting hash value into the following line root_password_sha2 = 29dba09d7a7ff4c1367be7d36a017b4267d728d31bd264f63debea --- 중략 --- 3) 클러스터 노드 및 샤드설정 # How many Elasticsearch shards and replicas should be used per index? Note that this only applies to newly created indices. # ATTENTION: These settings have been moved to the database in Graylog 2.2.0. When you upgrade, make sure to set these # to your previous settings so they will be migrated to the database! # This configuration setting is only used on the first start of Graylog. After that, # index related settings can be changed in the Graylog web interface on the 'System / Indices' page. # Also see http://docs.graylog.org/en/2.3/pages/configuration/index_model.html#index-set-configuration. elasticsearch_shards = 1 |
# systemctl daemon-reload
# systemctl enable --now graylog-server
2-3. 방화벽 등록
# firewall-cmd --permanent --add-port=9000/tcp
# firewall-cmd –reload
# firewall-cmd --list-all
| target: default icmp-block-inversion: no interfaces: ens33 ens36 sources: services: dhcpv6-client http https ports: 9000/tcp protocols: masquerade: no forward-ports: source-ports: icmp-blocks: rich rules: |
2-4. 접속 시도
# firefox http://localhost:9000

성공적으로 접속할 수 있다.
단 주의사항으로 시스템 자체의 부하를 많이 잡아먹는 프로그램임으로 로그인창에서 원활하게 작동하지 않는 경우가 있다.
특히 비밀번호 입력 시 입력이 안되는 경향이 있는데 미리 다른곳에 복사하여 클립보드에 저장 후 입력하여 이용하면 나름 쾌적하게 이용할 수 있다.
Graylog 연동
1. syslog 연동
graylog 접속 -> System -> inputs 으로 이동.

Syslog UDP 입력 후 Launch new input 클릭

Globla 체크 -> Title 입력 -> port 입력
* title : 로그 제목 입력.
* prot : syslog Fortforwarding 할 포트 번호 입력.

입력결과 inputs 설정이 완료된다.

2. rsyslog 설정 변경
# vi /etc/rsyslog.conf
| # An on-disk queue is created for this action. If the remote host is # down, messages are spooled to disk and sent when it is up again. #$ActionQueueFileName fwdRule1 # unique name prefix for spool files #$ActionQueueMaxDiskSpace 1g # 1gb space limit (use as much as possible) #$ActionQueueSaveOnShutdown on # save messages to disk on shutdown #$ActionQueueType LinkedList # run asynchronously #$ActionResumeRetryCount -1 # infinite retries if host is down # remote host is: name/ip:port, e.g. 192.168.0.1:514, port optional *.*@192.168.20.200:5140 |
Graylog 연동
1. 로그 생성
실제 로그를 여러 번 생성하기 위해 named 데몬을 여러 번 재 실행하는 스크립트를 제작한다.
# cd /root/bin
# vi deamonrestart.sh
| #!/bin/bash for i in $(seq 10) do systemctl restart named sleep 5 |
# chmod 700 deamonrestart.sh
# ./deamonrestrat.sh
# systemctl restart rsyslog
2. 생성된 로그 확인
graylog 로 돌아와서 show received messages 를 클릭한다.

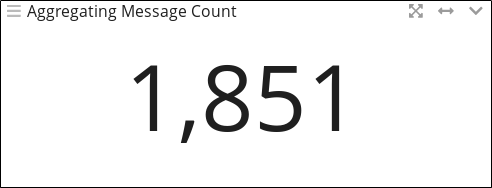
좌측 + 아이콘 -> Predefined Aggregation -> Message Count 로 접속하여 로그 개수를 확인한다.
좌측 + 아이콘 -> Predefined Aggregation -> Message Table 을 통해 로그 기록의 대한 정보를 확인할 수 있다.

필요시 저장 또한 가능하다.

'모의해킹 침해대응 과정 > 본 과정' 카테고리의 다른 글
| 서버보안 / 리눅스 로그보안 (0) | 2021.07.14 |
|---|---|
| 서버보안 / PAM (Pluggable Authentication Modules) (0) | 2021.07.06 |
| 서버보안 / 개요 (0) | 2021.07.06 |
| 암호학 / 해시(Hash)함수 (0) | 2021.06.30 |
| 암호학 / 공개키(비 대칭키)암호 (0) | 2021.06.25 |

